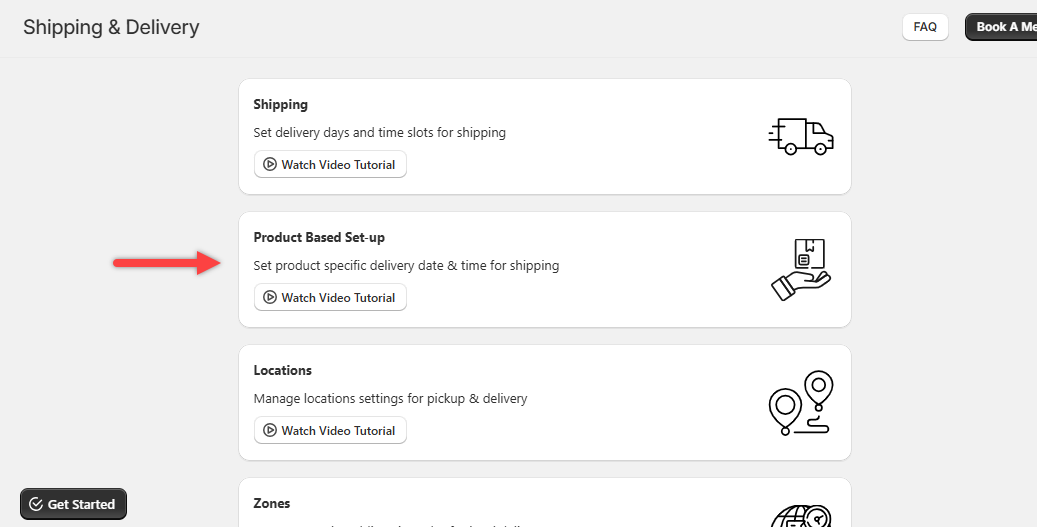
- Let’s now proceed to configuring the delivery date and time for shipping based on different products.
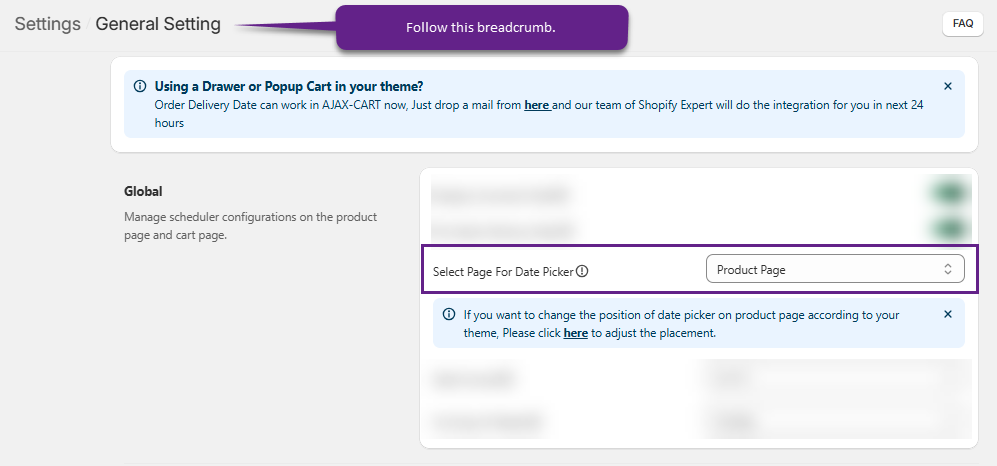
- Firstly, you must set the Date Picker on the Product Page through Setting > General Settings > Global > Select Page for Date Picker > Product Page. If you have selected the Product Page only then you can set all configurations in respect to the products.
- Now, navigate back towards Shipping & Delivery > Product Based Set-up.
- At the top of the page, you will find the Enable this Manage shipping & calendar visibility configuration product wise toggle to Enable in order to enable the configuration.
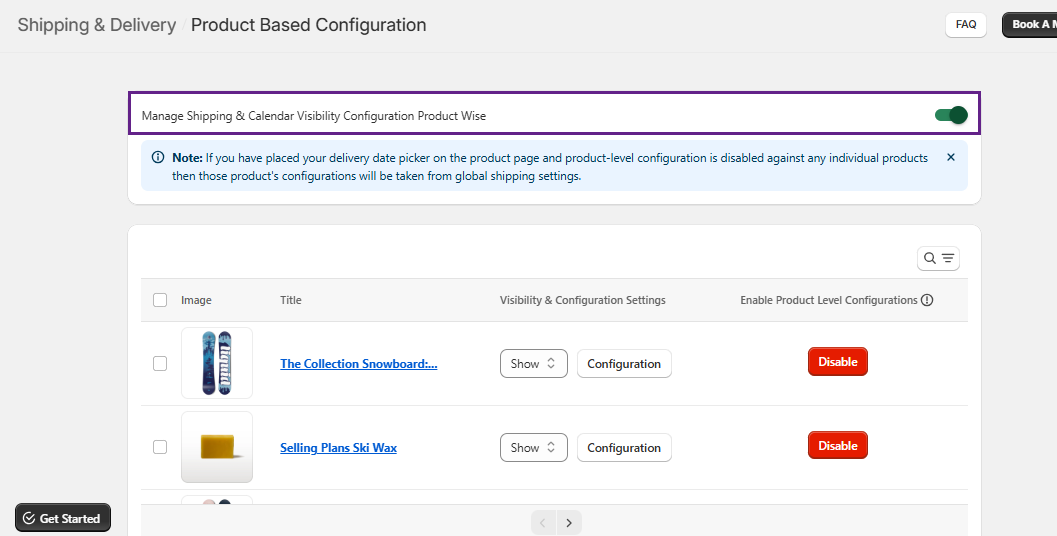
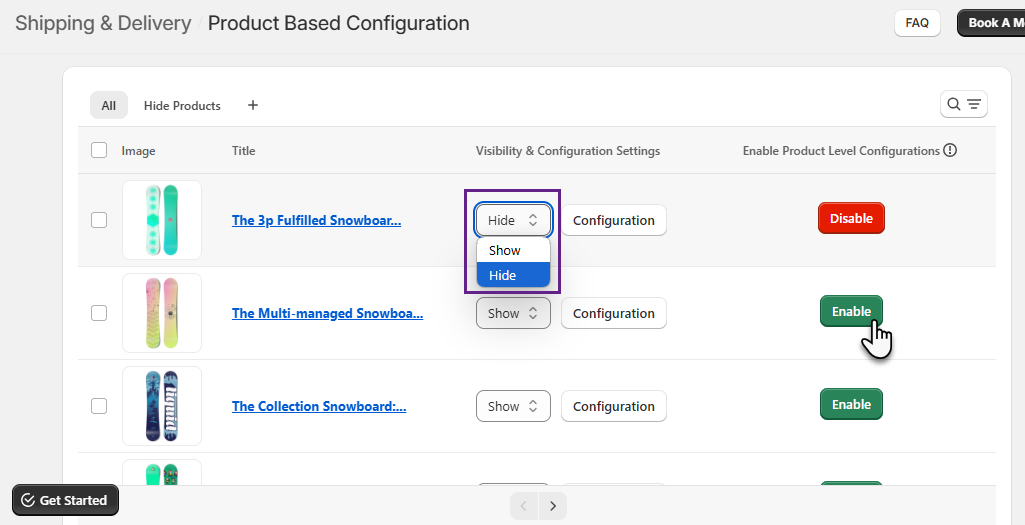
- Here, the grid displays product Image, Title, Visibility & Configuration Settings and Enable product level configurations.
- You have the flexibility to Show/Hide any individual product. Also you can Enable/Disable through the respective button listed in the Enable Product Level Configurations to configure settings at the product level.
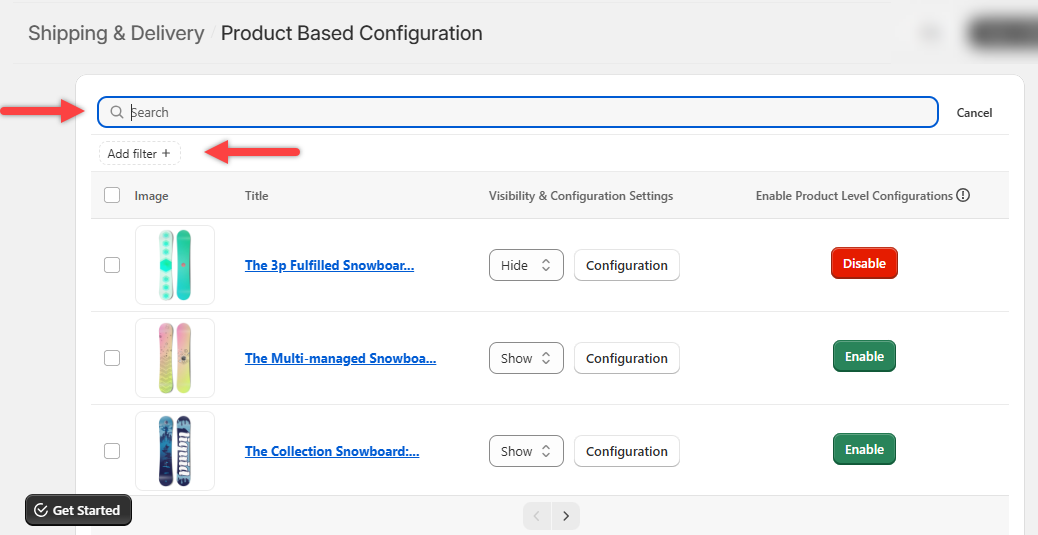
- You can search for any products or can even apply filters and accordingly the list of products on the grid will be shown.
Product Configuration
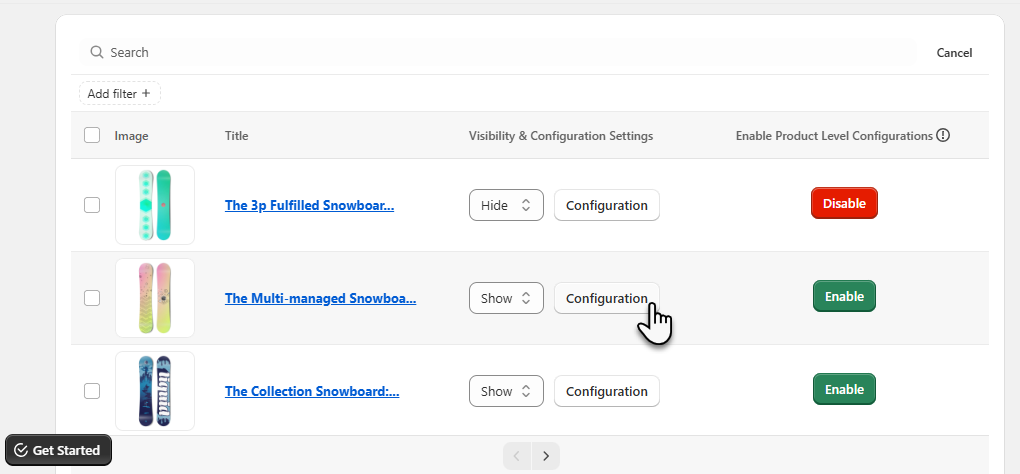
- To configure a specific product click on the Configuration button in the Visibility & Configuration Settings. A pop-up will appear where you can proceed to configure the products.
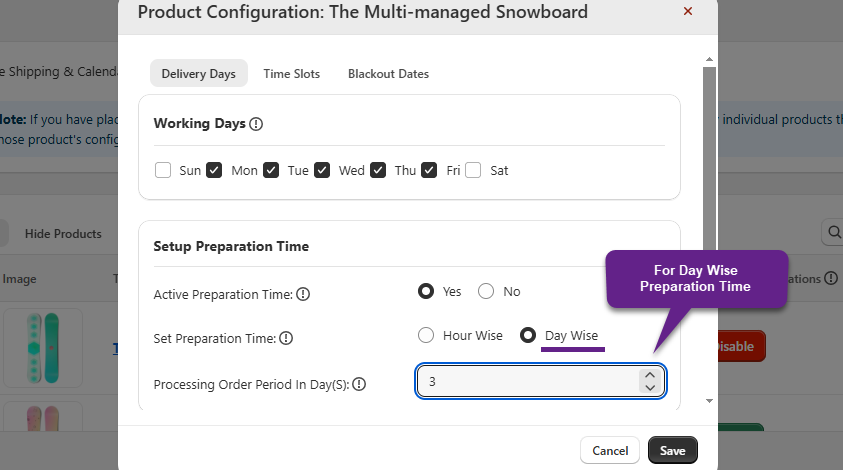
Delivery Days
Working Days
- As per your availability, Enable/Disable the Delivery Day(s) by clicking on the checkbox. If you have disabled any day, it will be disabled on the Calendar in Delivery date selection in frontend.
Set Preparation time
- Click on Yes in order to enable preparation time. Further, you can set preparation time as Hour Wise or Day Wise.
- For Hour wise – Enter how much time (in minutes) it will take to process the order.
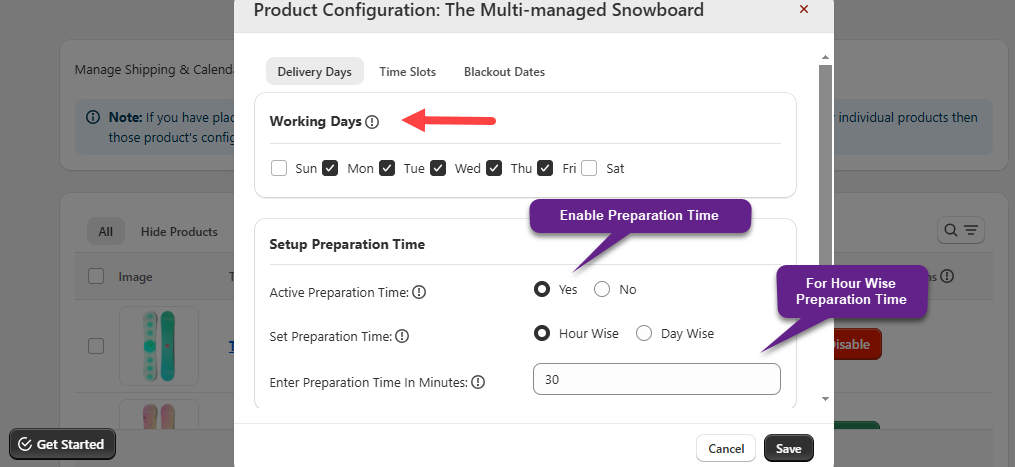
- For Day wise – Insert how many days are required to process the order once the customer places the order. You can disable this feature if you do not want to set preparation time.
Maximum Delivery Period
- Set the maximum delivery period to define the number of days available for selection as delivery date to your customers. Set 0 or leave it blank if you offer the same-day delivery option.
- After configuring the delivery days, click on the Save button.

Time Slots
- Those days will be shown which have been selected in the Working Days section. Add a time slot for each day to offer delivery options to customers.
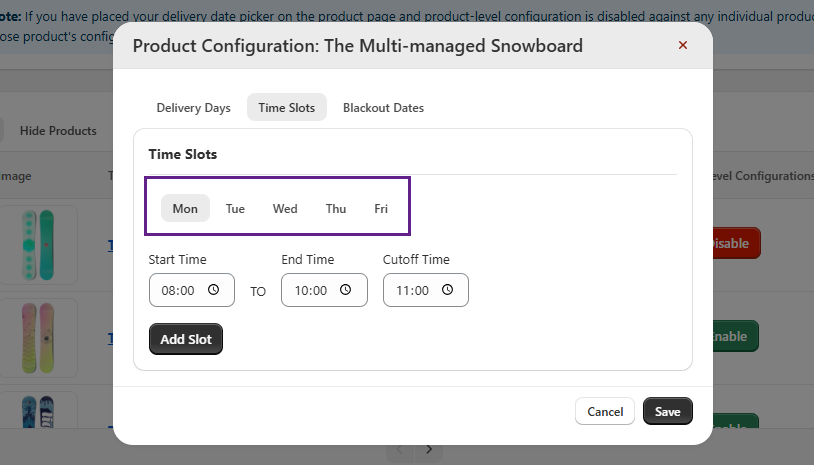
Cut-off Time
- Cut-off Time is used to define what time you stop accepting orders on the same day. From the entered time, the slots will not be displayed onto the store.
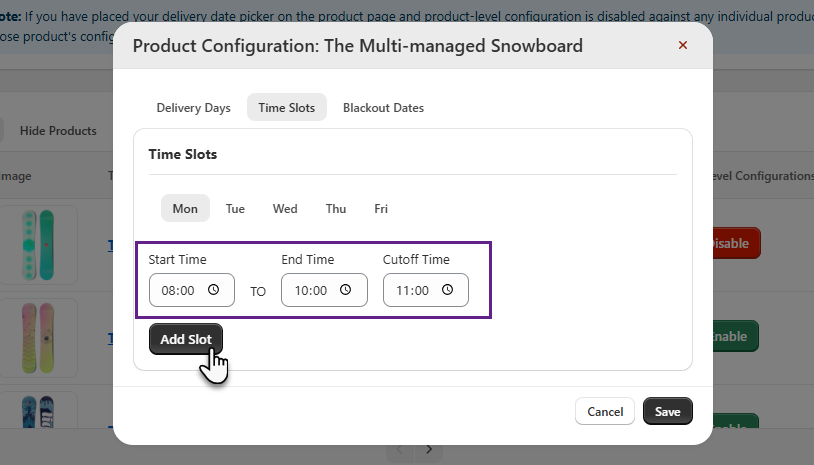
Time Slots
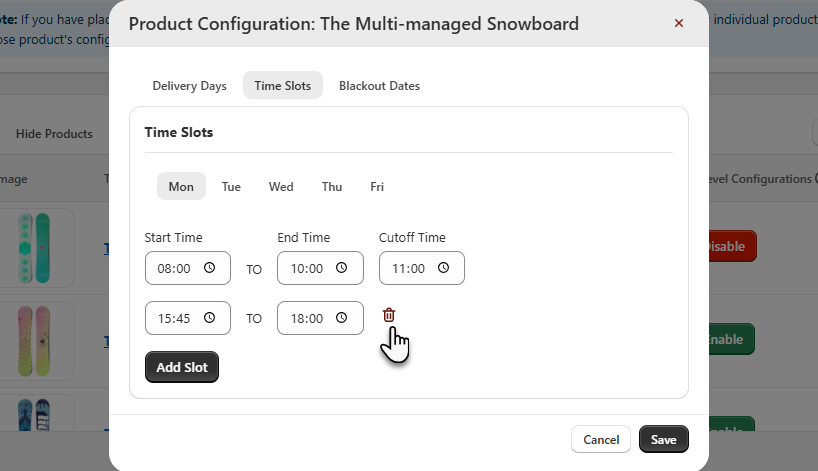
- You can set a time slot by defining the start and end time as per your preferences. Through the Add Slot button you will be able to set additional slots as well.
- For deleting a time slot, you just need to click on the Delete icon displayed beside the respective slot.
- Once all the configurations have been completed, proceed to Save them.
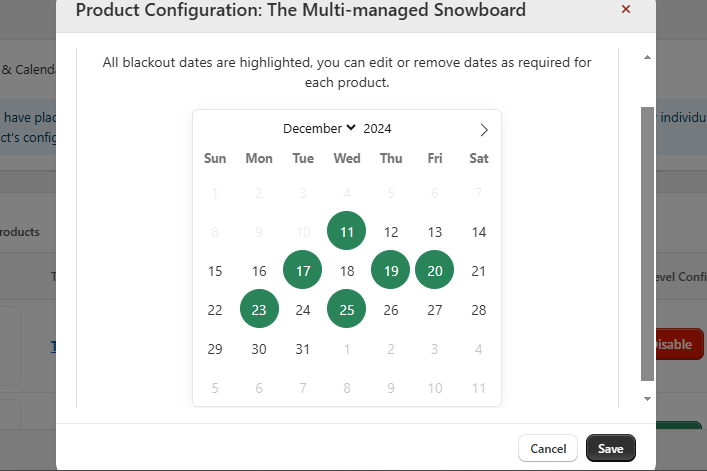
Blackout Dates
- Select the dates on which you are not available to deliver the orders to customers. Customers will not be able to select these blackout dates to receive orders.
- Once you configure the blackout dates, click on the Save button.
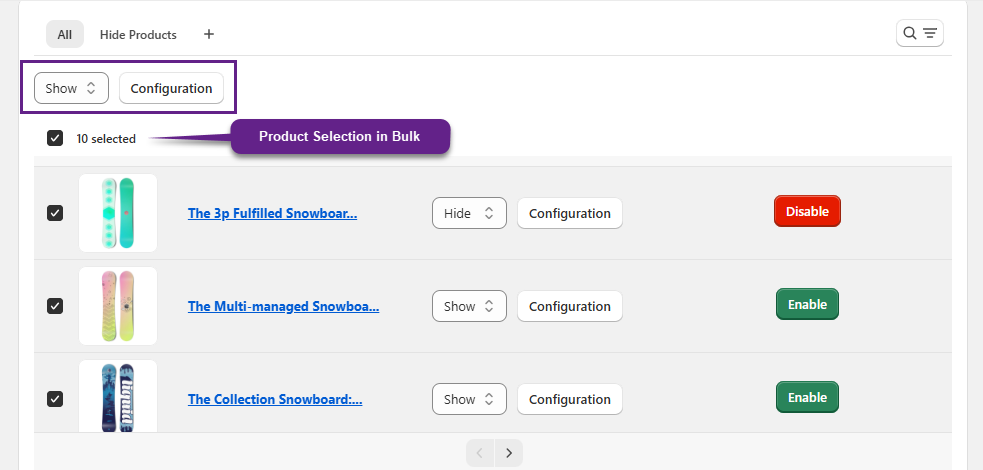
Bulk Product Configurations
- You can show/hide multiple products at once as well as configure them by simply clicking the “Select All” checkbox and then proceed to the respective sections.
- For instance, if you need to Hide multiple products, direct towards the Show/Hide section displayed above the grid and Hide these selected products.
- To configure, simply click the Configuration button. A pop-up will appear, allowing you to configure all the selected products at once.