


The default configuration settings include Views, Activities, Owner Color, Business Unit, Unscheduled Activities, Conflict Management, Notification, Holidays, Locations, Upcoming Events. To set them to follow the below instructions.
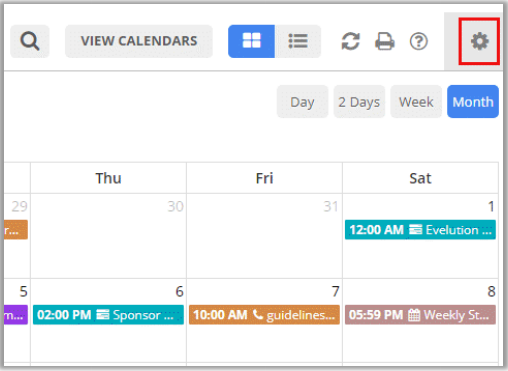
To configure the Calendar 365 settings, click on the “Gear” icon available on the Calendar main page. From there you can manage Default Configuration settings from here for:
- Views
- Activities
- Owner Color
- Business Unit
- Unscheduled Activities
- Conflict Management
- Notification
- Holidays
- Locations
- Upcoming Events
Note: Users with System Administrator or AppJetty Calendar 365 Administrator role can configure the Default Configuration Settings.
Views Configuration
Configure the default view of the calendar under the “Views” section. By configuring the individual setups/options, you can define the view of the Calendar.
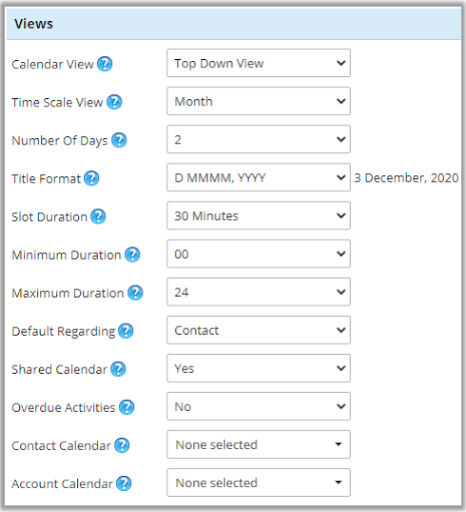
Calendar View- You can set any of the Default Calendar View of the calendar from the following:
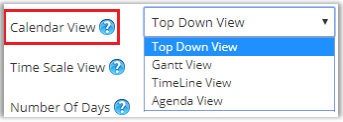
- Gantt View
- Top-Down View
- Timeline View
- Agenda View
Time Scale View- You can set the default Time Scale View of the calendar from the following:
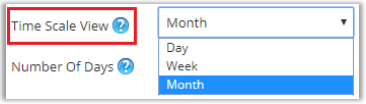
- Day
- Week
- Month
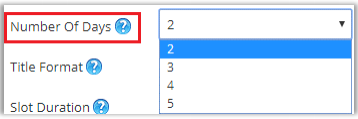
Number of Days- Select the number of days you would like to view the calendar from the Day Span View.
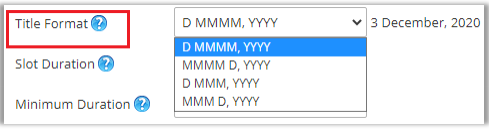
Title Format- Select the format to display on Calendar. The format that you select here will be displayed when you select Day, Day Span, and Week view for Calendar.
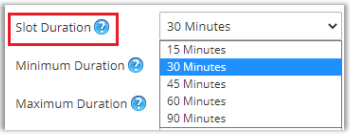
Slot Duration- Select the slot durations for “Top-Down view”: 15, 30, 45, and 60 Minutes.
Minimum/Maximum Duration- You can set the minimum/maximum time for the Calendar Time block in the Day / Week view. You can define the duration of availability or Working Timings default.

By default, the Minimum value is 00:00 and the Maximum value is 24:00. You can insert the availability hours of the day here.
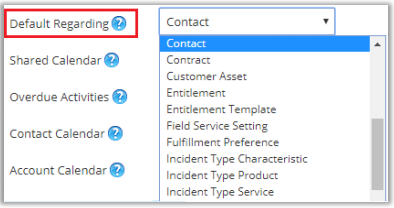
Default Regarding- You can set the default ‘Lookup Record’ entity.
Shared Calendar- If you want to share the calendar with another Admin User, select ‘Yes.
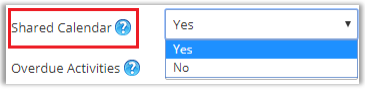
Overdue Activities- By selecting Yes, the expired activities will be highlighted with a ‘red’ alert mark.

Contact Calendar- You can select entities related to the contact you want to include in the calendar.
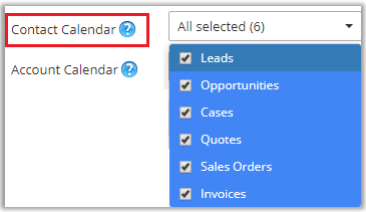
Entities related to contact are Leads, Opportunity, Case, Quote, Sales Order, Invoice.
Account Calendar- You can select entities related to accounts that you want to include in the calendar.
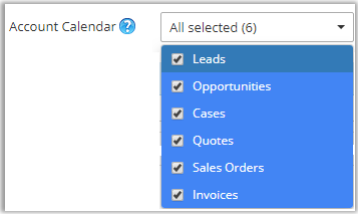
Entities related to the account are Leads, Opportunity, Case, Quote, Sales Order, Invoice.
Note: The entities that are added from the setup page will be available in the calendar for the user to select from.
Activities:
- To configure the Activities of the calendar, navigate to the ‘Activities’ section.
- It will include tabs for Task, Fax, Phone Call, Email, Letter, Appointment, Recurring Appointment, Service Activity, Campaign Activity, Bookable Resource Booking, and Custom Activity, and each of the activity tabs will contain the following fields:
Task- You can check the checkbox to display the Task (activity) in the calendar by default.
Default Color- You can select the default color for the activity to be displayed in the calendar.
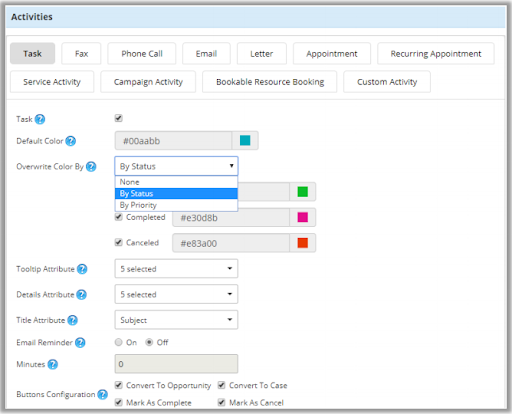
Overwrite Color By- You can select Overwrite Color as By Status & By Priority.
If you want to select the color as per the “activity status”, you can select the color for Open, Completed and Canceled status.
Note: For Appointment, Recurring Appointment, and Service Activity, you can select a color for Schedule status.
If you want to overwrite the color as per “priority”, you can select the color for High, Medium and Low priority.
Tooltip Attribute- You can select the tooltip attributes from the list of different attributes to be included in the activity tooltip that appears on hovering the activity in the calendar.
Details Attribute- You can select the details attributes to be included in activity detail that appears on clicking the activity in the calendar, from the list of different attributes available.
For both the list, you can select a maximum of 10 attributes and a minimum of one attribute, or else it will show a validation message stating to select at least one attribute.
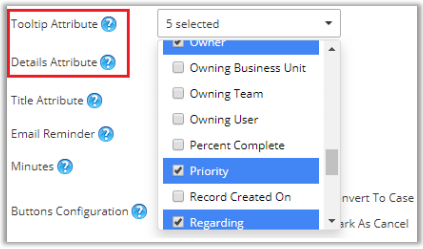
Check the boxes besides attributes that you wish to include.
Title Attribute- You can select the title attribute to be displayed as the title of activity in the calendar. The ‘Title Attribute’ comes with the default selection of the Subject attribute. You can select only one attribute from the list of different attributes.

Email Reminder- You can enable/disable the email reminder for an activity.
On: Choose ‘On’ to enable Email reminder of the activity
Off: Choose ‘Off’ to disable Email reminder of the activity
Note: Once you have enabled the ‘Email Reminder’, you will receive a reminder email for the activity. The user who has created the activity will receive the mail on the email address configured during account creation.
Minutes- Enter the number of minutes before which you want to send the reminder for the activity through email to the users included for the specific activity.
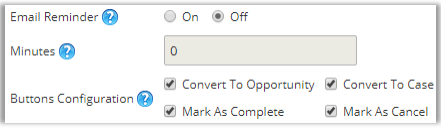
Buttons Configuration- Select the action buttons that you need to include in the calendar. These action buttons are the ones which if enabled lets you perform those actions directly from the calendar. Here activities like Task, Fax, Phone Call, Letter, Appointment, Service Activity, Custom Activity have actions buttons for:
- Convert to Opportunity
- Convert to Case
- Mark as Complete
- Mark as Cancel
Note: All the following activities have different action buttons to perform. You will get the Buttons Configuration as per the configuring the specific activity.
Recurring Appointment- ‘Recurring Appointment’ activity has an End Series button in addition.

Email Activity- ‘Email’ has the Convert to Lead button.

Campaign Activity- ‘Campaign activity’ has a Close Campaign Activity button in addition.
![]()
Owner Color:
To define the color of the activities based on the owner that is CRM users. By enabling this option, you can differentiate the user-wise activities in different colors on the calendar.
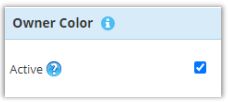
By ‘selecting’ the Owner Active checkbox, you will navigate to the Owner’s color Configuration.

You will get the list of the CRM Users. Using the color picker, you can choose the color for the specific users.
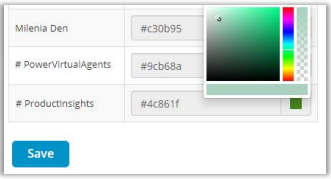
After selecting the color for the users, click on the Save button to save the configuration.
Note: Owner-wise color will appear only in the Resource Calendar.
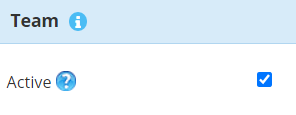
Team:
By enabling the “Team”, you can display the “Team” resources of the default CRM under the “Resource” tab of the Resource Calendar.
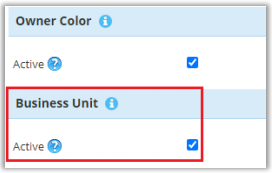
Business Unit:
By enabling the “Business Unit”, you can display the “Business Unit” resources of the default CRM under the “Resource” tab of the Resource Calendar.
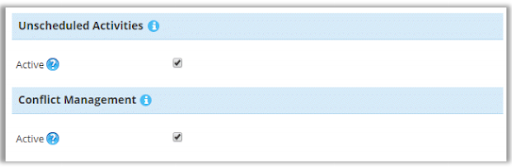
Unscheduled Activities:
To manage the unscheduled activities, check the Active box. By default, it is disabled.
On enabling the Unscheduled Activities option, you get to manage unscheduled appointments and service activities without required attendees and assigned resources respectively from the calendar.
Conflict Management:
To get alerts for conflicting activities based on time, check the Active box to enable conflict management in the calendar. On enabling conflict management, you get an alert message when conflicts occur at the time of scheduling of appointments or service activities.
Resource Scheduling:
To enable the “Resource Scheduling” module, ‘check’ the check box. After selecting this option, you can select the Default (User Working Hours) or AppJetty Scheduler.
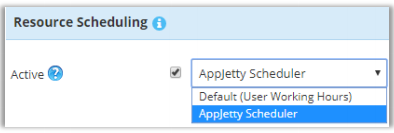
Based on your selection, the working hours of users or your team members will be displayed in the calendar.
Notifications:
To manage the notification reminder of the activities, navigate to the “Notifications” section.
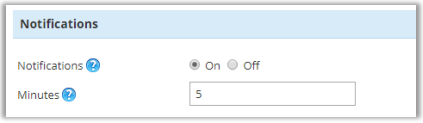
You will get the notification reminder about the upcoming activity when you are on the Calendar page.
Desktop Notifications
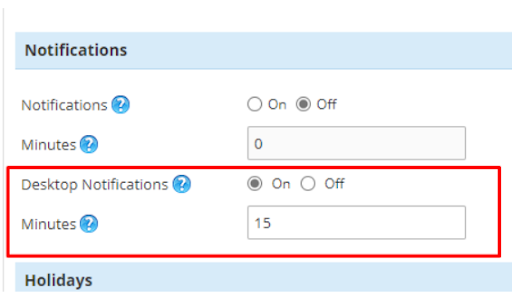
Enable the Desktop Notifications to manage the desktop reminder for the activities.
Holidays:
To manage the holidays, navigate to the ‘Holidays’ section.
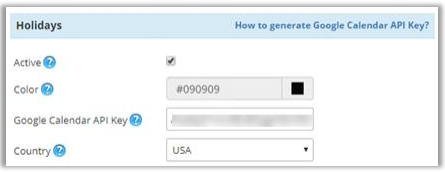
It will include the following fields:
- Active: Check the checkbox to activate the holidays in the calendar
- Color: Set the color to be displayed for the Holiday in the calendar
- Google Calendar API Key: Enter the Google Calendar API Key for the holidays to be displayed in the calendar as per your selected country.
- Country: Select the country whose holidays are to be displayed in the calendar.
Note: To generate the Google Calendar API Key refer to: https://console.developers.google.com/apis. You can directly navigate to this page from the configuration page by clicking on the available link.
Locations:
To activate location suggestions in the calendar, navigate to the “Locations” section and check the active box to enable them.
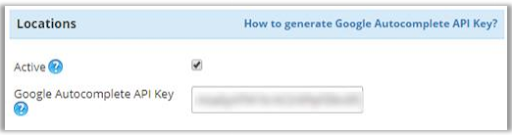
If enabled, you need to enter the Google Autocomplete API key that you have in order to get the location suggestions.
Note: To generate the Google Autocomplete API Key refer to https://developers.google.com/places/webservice/autocomplete. You can directly navigate to this page from the configuration page by clicking on the available link.
Upcoming Events:
You can set the default view of the “Upcoming Events” from this section. It will contain the following fields:
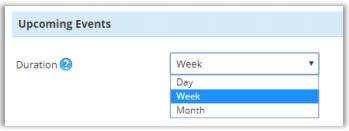
- Duration: You can select any of the default views for ‘Upcoming Events’ from the Day, Week, or Month.
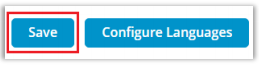
- Save: After configuring the Views, Activities & other relevant options, click on the ‘Save’ button to save all the configuration settings for Calendar 365.