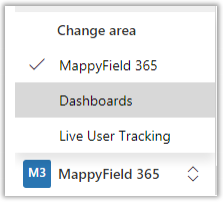
To view your dashboard, Navigate to the Dashboards tab in the MappyField 365 option which is present in the Bottom-Left corner of the application. You can see the list of all the available Dashboards. One of those Dashboards is MappyField 365 Custom Dashboard, which will show your created Dashboard.
MappyField 365 Custom Dashboard
- You can configure the custom dashboard as per your requirement by selecting the entity and its relevant records.
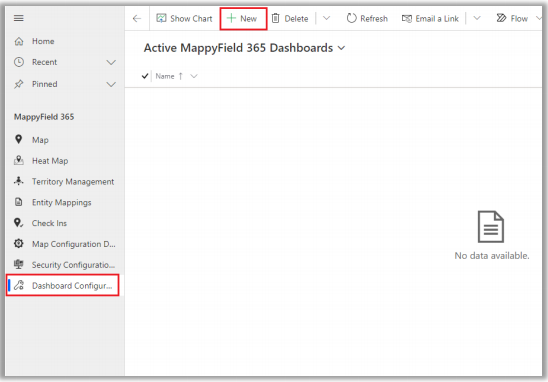
- For that navigate to the Dashboard Configuration from the MappyField left-side navigation panel.

- From the Dashboard Configuration, you can create a new customized dashboard as per your requirement, for that click on the + New button.

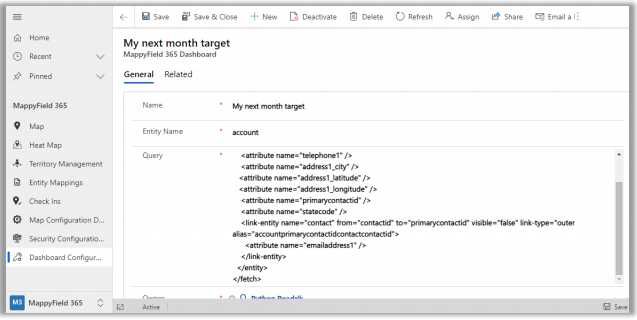
- You need to insert the following details to customize the dashboard:
- Name: Insert the relevant name for the Custom dashboard
- Entity Name: Insert the Entity name.
- Query: Insert the Query to customize the records.
- After inserting the details click on the Save button.
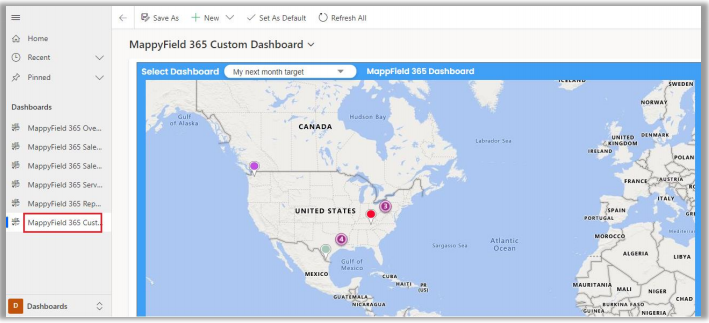
- Now, navigate to the MappyField Dashboards → MappyField 365 Custom Dashboard.

- By clicking on the MappyField 365 Custom Dashboards, you will get the Custom dashboard that you have configured.


