


In MappyField 365 a user has to Check-In to perform any assigned activity, and he/she has to Check-Out after completion of the activity.
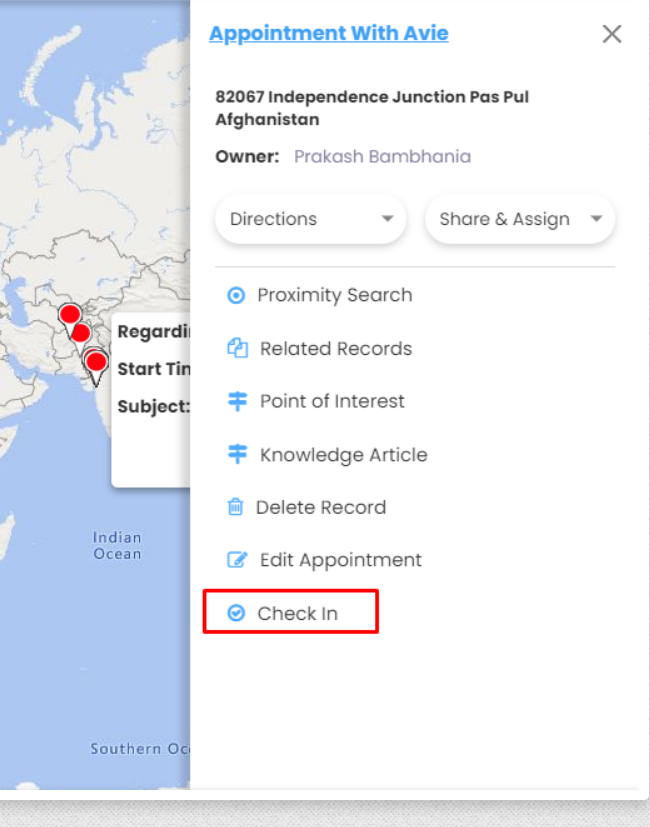
Check-In: A user can check-in to activity only if he is in the check-in radius. To check in, they have to click on a particular activity. As a result of which a panel will open on the right side of the screen. Now there is an option for Check-In on the panel. The user has to click on that option to check-in to the activity.
Check-Out: After completion of the activity, the user has to Check-Out of that activity. For that, the user has to click on the activity again and select the Check-Out option.
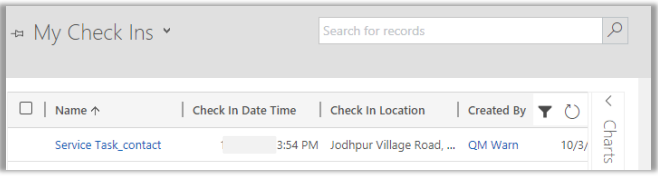
There is a tab called Check Ins on the left panel of the MappyField application. The tab will show all the check-in, Check Out records of the user.
Check-In & Check-Out:
- You can use check-in and check-out features in all activity entities.
- Check-In feature enables admin/user to keep track of exact time spent on an activity.
- With the help of the check-in/check-out button, you can tag geo-coordinates of the location and time while starting and completing an activity.
- To perform a check-in, click on the check-in icon available on the info card of an activity.

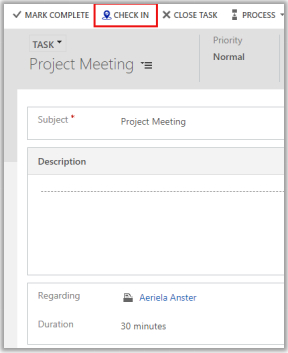
- Once checked in, it would show an action button to check out. Users can insert the Notes at the time of Check-Out.
- Users can Check-In or Check-Out from the map by clicking on the activity or from the detailed view of activities by clicking on the title activity name.
- When CRM Users (team members) check in or checkout any appointment, at that time the mail will be sent to the record owner of that appointment. In the mail, the record owner will get the Check-in and/or Checkout details.
- To check all the Check-In records, navigate to the AppJetty tab → Check-Ins. It will list all the check-in records.
- Check-in takes the address of the record regarding an activity and lets you perform check-in only when the address is found. The user will only be able to check-in if they are in the check-in radius as configured by the admin.
- On the map as well, you can plot the check-in entity and its corresponding view to have an idea of all check-ins.
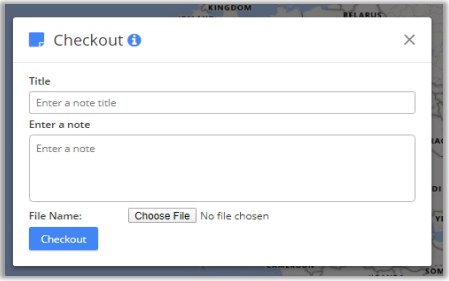
- Users can add notes and upload the attachment while checking out from the activity.
- You can check the Notes in the Check-In module within the Check-Out view from the Note section.
- It will list all possible routes and highlight the optimized route. Also, you can get directions based on means of transport like Driving, Walking, and Transit. You can also share routes in email using the link.