


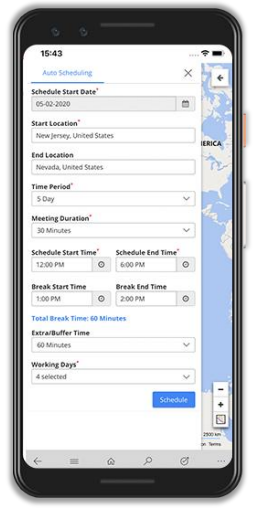
The Auto Scheduling feature in MappyField 365 lets you automatically schedule a number of records. In the Auto-Schedule feature, you will have to input details like Start Date, Start Location, End Location, Time Period, Meeting Duration, Schedule Start Time, Schedule End Time, Break Start and End Time, Extra/Buffer Time, Working Days. After you define all the inputs, click on the Schedule option. It will automatically schedule all the records on the basis of the input.
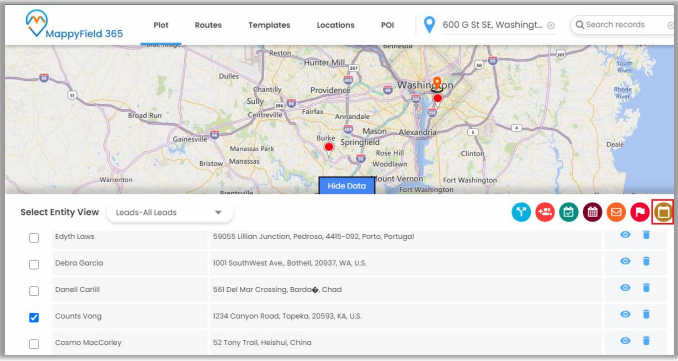
- You will find the Auto Schedule Records option only from the “Data Grid”’. Select the required data from the Data Grid and click on the “Auto Schedule” icon shown in the box.
- Once you click on “Auto Schedule” icon, you will get a Warning message regarding the removing the plotted records from the map.
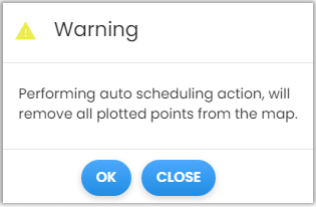
- By clicking OK, you will be redirected to the “Auto Scheduling” slider from the right side.
- In map configuration Auto scheduling configuration will be there according to set values.
- To create an Auto Scheduling, fill the required data.
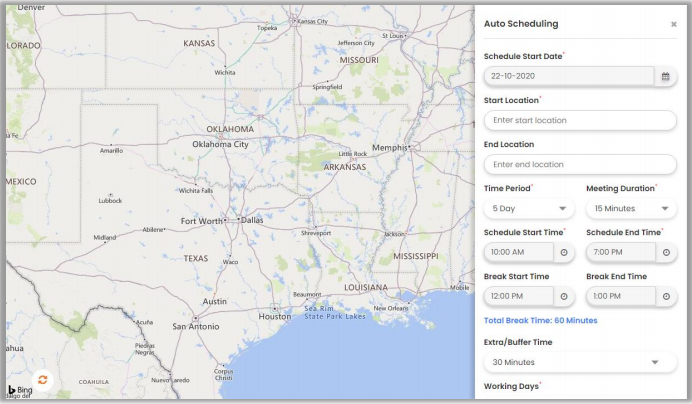
- Time Period: Select Time duration, Total working days/week/month. (Mandatory field)
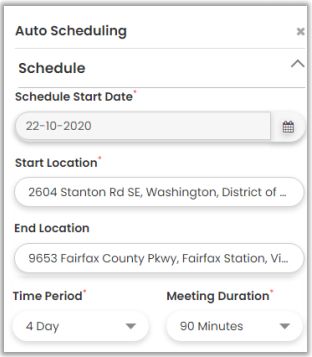
- Start Location: Insert your starting location from where you want to start the schedule. (Mandatory field)
- End Location: Insert your ending location where your scheduling ends.
- Time Period: Select day/days for Auto Schedule.
- Meeting Duration: Select the time for each plotted record for meeting or appointment
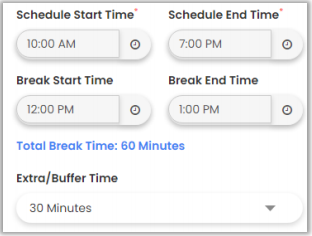
- Schedule Start Time: Select Starting Time of the day.
- Schedule End Time: Select Ending Time of the day.
- Break Start Time: Select Break Start time in between scheduled time.
- Break end time: Select Break End time in between scheduled time.
- Extra/Buffer Time: Select time for a day for extra work.
- Working Days: Select days for working. You will get the date wise schedule as per selection of Time Period and you will get the date wise schedule as per selected days.

- If your activity is starting from the date of 22nd Oct (Thu.), Time period is 4 days and selected Days are: Monday, Tuesday, Thursday, and Friday. You will get the date as per the selection of the days. Wednesday will be skipped.
- You can save the schedule by clicking on Save Schedule.

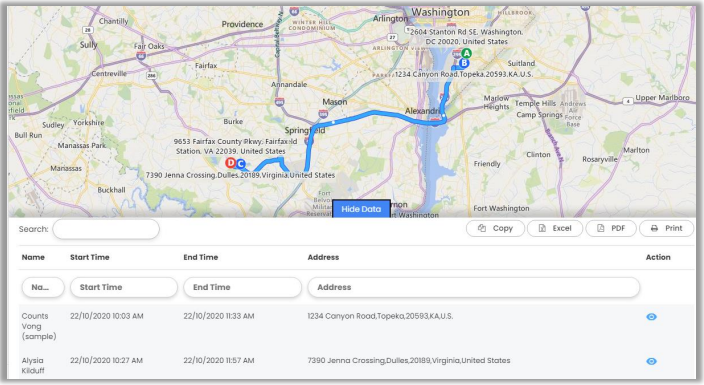
- By clicking on the Save Schedule, the Routes will auto schedule on the map.
- Here, you will get the direction based on SPF algorithm.
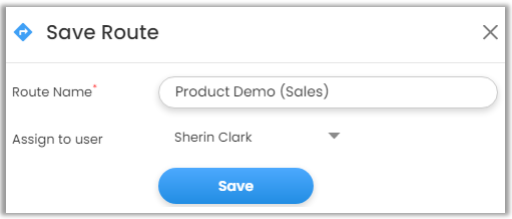
- As you click on the Save Schedule button, the Save Schedule popup will appear. Enter “Route Name” and “assign” it to user by selecting user from the dropdown.
- You will get the Saved Scheduled Routes under the Direction tab.
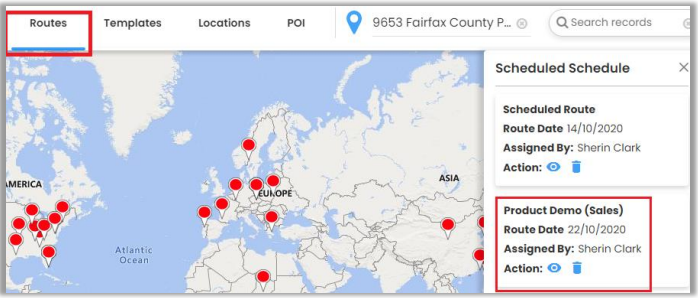
- You can view the Routes by clicking on the View icon.
- The Sales reps/executive can easily Auto Schedule any activities, marketing campaign or multiple appointments from their own mobile/tab device.